


Manage Conference/Single Vouchers
Create and manage single voucher codes which can be issued to groups of guest users. This is useful for issuing vouchers to conference delegates. Limit the number of devices which can user the voucher code and the time period it is valid for; this helps to control WiFi portal use.
Choose to:
 Change
the status of a voucher. Only 'active' vouchers can be used. Vouchers
are automatically listed as 'inactive' when outside of their Start
/ stop dates.
Change
the status of a voucher. Only 'active' vouchers can be used. Vouchers
are automatically listed as 'inactive' when outside of their Start
/ stop dates.
Delete
a voucher. If a voucher has been created in error or contains misinformation,
delete it and create a new one.
Create a voucher
To create a voucher code, follow the steps below:
1. Select ![]() Manage from the left hand menu
and click Vouchers.
Manage from the left hand menu
and click Vouchers.
The Voucher screen is displayed.
2. Select the  Create
Conference / Single tab.
Create
Conference / Single tab.

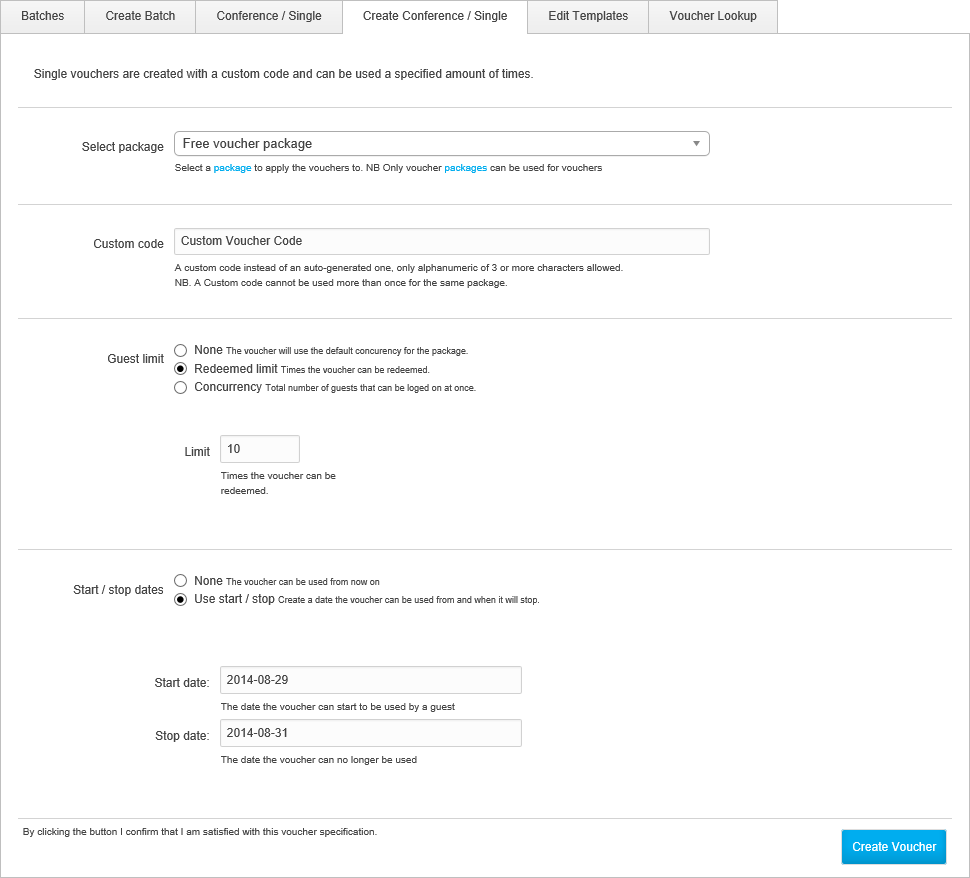
3. Select a package for the voucher code. Only voucher packages can be used for vouchers. All the settings and attributes of the selected package are applied to the voucher code.
4. In the Custom code field, either:
Use the default
entry of 'Custom Code Voucher'. A unique code is generated for the voucher.
-or-
Enter your own
code for the voucher. This must be a unique three character alphanumeric
code.
5. Select the Guest limit for the voucher. Choose from:
None.
The voucher package default attribute of 'Simultaneous-Use' is applied.
There are no restrictions to the number guests who can use the voucher.
Redeemed
limit. Enter the number of times the voucher can be redeemed. This
may reflect the number of conference delegates you are expecting. So,
if you are expecting 50 conference delegates set the limit to '50' and
the code can only be redeemed 50 times.
Concurrency.
Enter the number of guests that can be logged on at once, this can help
control your WiFi usage. Once the concurrency limit has been reached additional
guest users can only log on to your WiFi portal if another guest user
logs off.
6. Select the Start / stop dates for the voucher:
None.
The voucher is valid immediately.
Use
start / stop. Enter the dates that the voucher can start/stop being
used.
7. Click Create Voucher.
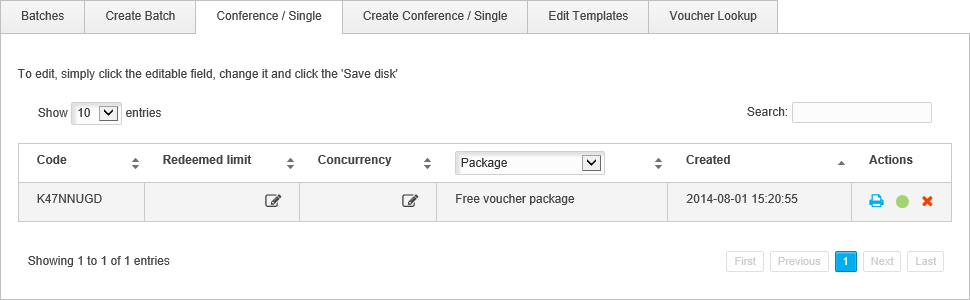
The voucher batch is now listed in the Conference
/ Single tab. You can now print the voucher.
8. In the Conference
/ Single tab, select the voucher that you want to work with and
click  to
open Print options.
to
open Print options.
9. Enter the number of copies that you want to print and either:
Multiple
to print multiple vouchers per page. This saves resources but you will
need to separate vouchers before handing them to guest users.
-or-
Full
Page to print single vouchers per page.
10. Click Print.
Change the status of a voucher
Only 'active' vouchers can be used. Vouchers are automatically listed as 'inactive' when outside of their Start / stop dates.
To change the status of a voucher, follow the steps below:
1. Select ![]() Manage from the left hand menu
and click Vouchers.
Manage from the left hand menu
and click Vouchers.
The Voucher screen is displayed.
2. Select the Conference
/ Single tab.
3. Select the voucher that you want to work with and either:
Click
 to activate the voucher.
-or-
Click
 to deactive the voucher.
Changes are saved automatically.
Delete a voucher
Delete a voucher which has been created in error or contains misinformation.
To delete a voucher, follow the steps below:
1. Select ![]() Manage from the left hand menu
and click Vouchers.
Manage from the left hand menu
and click Vouchers.
The Voucher screen is displayed.
2. Select the Conference
/ Single tab.
3. Select the voucher that you want to work with
and click  .
.
You are prompted: Are you sure you want to delete?
4. Select OK.
The voucher is deleted.