Create a guest user Portal
Create WiFi portals for your guest users to access your WiFi. Choose to add your own logo to reflect your company branding.
 Click here to see how your selections influence
the look of your portal.
Click here to see how your selections influence
the look of your portal.

You can set up a different portal for each company and site in your estate, just ensure you are working in the correct level of your estate before you create a portal. See Understanding My Estate for more information.
To create a portal, follow the steps below:
1. Select ![]() Create from the left hand menu and click Portal.
Create from the left hand menu and click Portal.
The New Portal screen
is displayed.
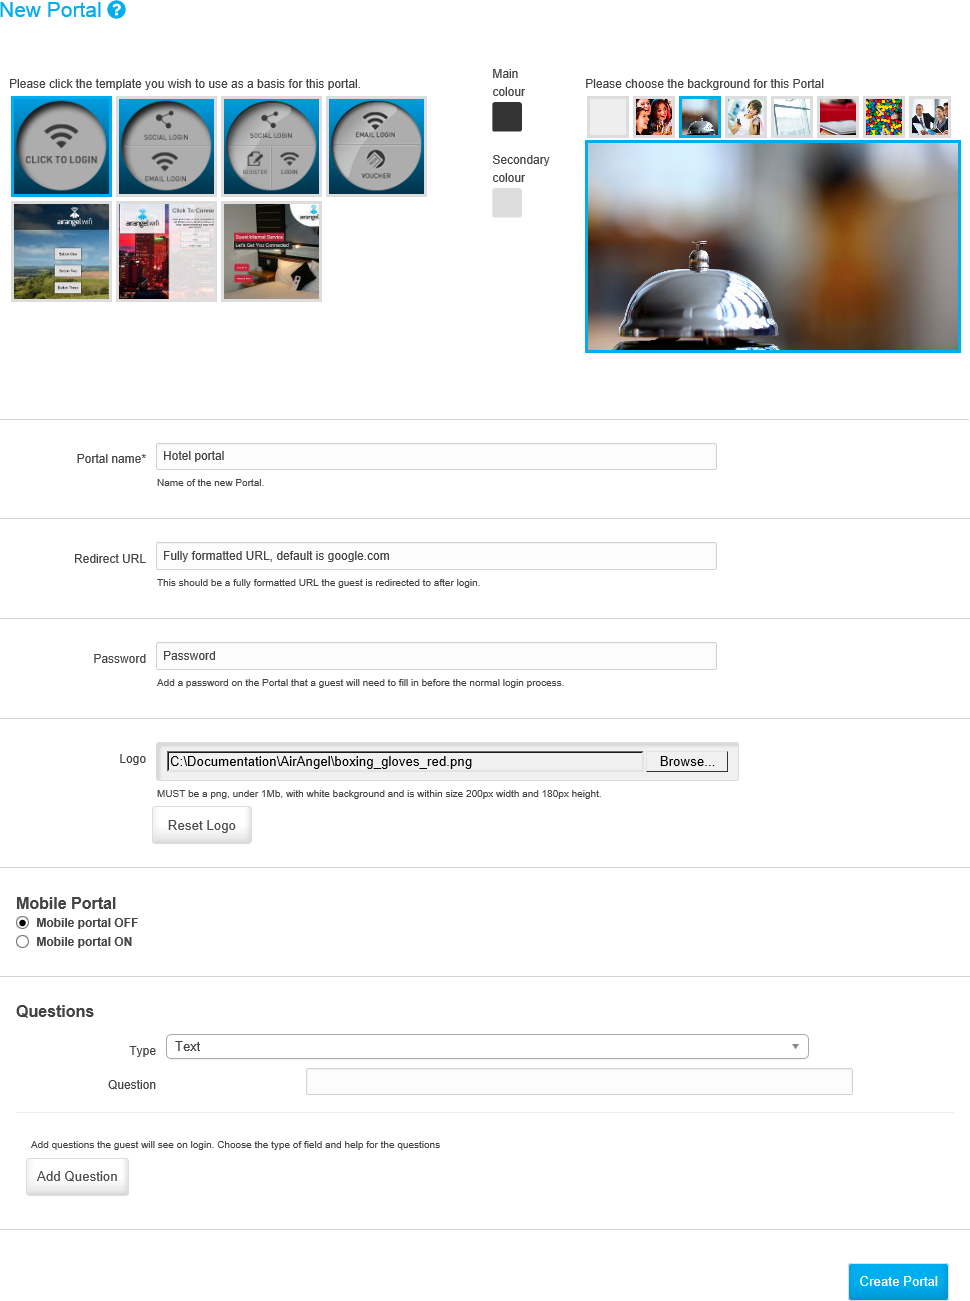
2. Set up the look of your portal using the top section of the screen:
a) Select a template for your portal. The options available have different login functions, choose the most appropriate template for your guest users.
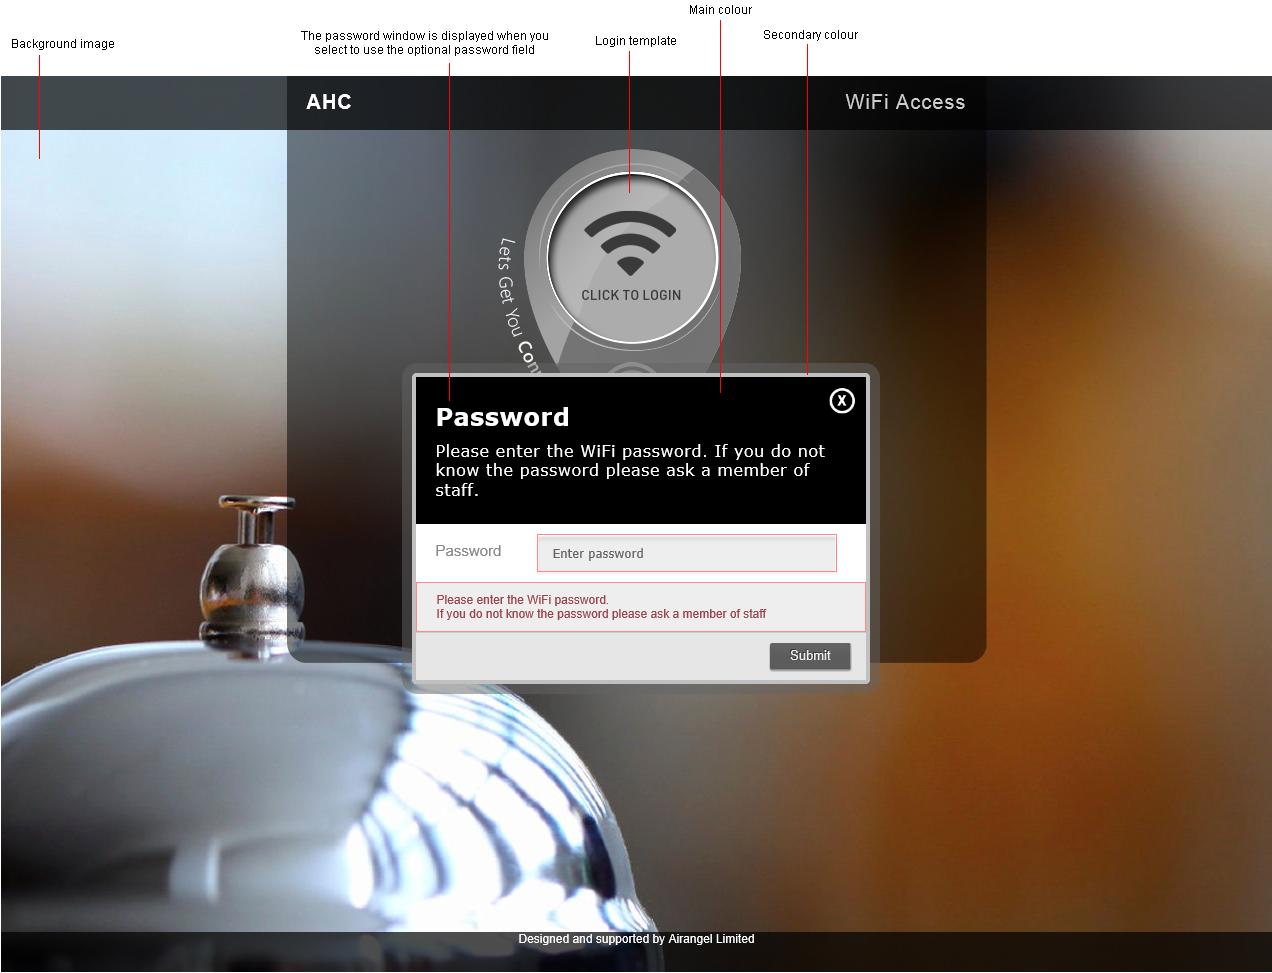
b) Click on the colour boxes and select/enter a hex colour code to use as the main and secondary colours for your portal. This is useful for applying your corporate colours to your portal design.
 Main
colour. Refers to the modal window background colour.
Main
colour. Refers to the modal window background colour.
Secondary
colour. Refers to the modal window border colour.
c) Select a background image for your portal. The image you select is displayed when guest users open your portal, choose an image that best matches your brand and business. You can upload your own custom background once you have created your portal, if required. See Edit the look and feel of a Portal for more information.
3. Portal name. Enter a clear and concise name for your portal. This is the only mandatory field on this screen.
4. Redirect URL. Enter the URL that the guest user is automatically redirected to after login. The default is 'google.com' but you may want to enter your company web address.
5. Password. This feature is optional but adds an extra level of access security if you need it. Either:
Enter a password.
When using this feature a pop up window is displayed when a guest user
tries to open your WiFi portal. The guest user must enter the password
before using your WiFi portal.
-or-
Leave this field
blank if you do not require this feature.
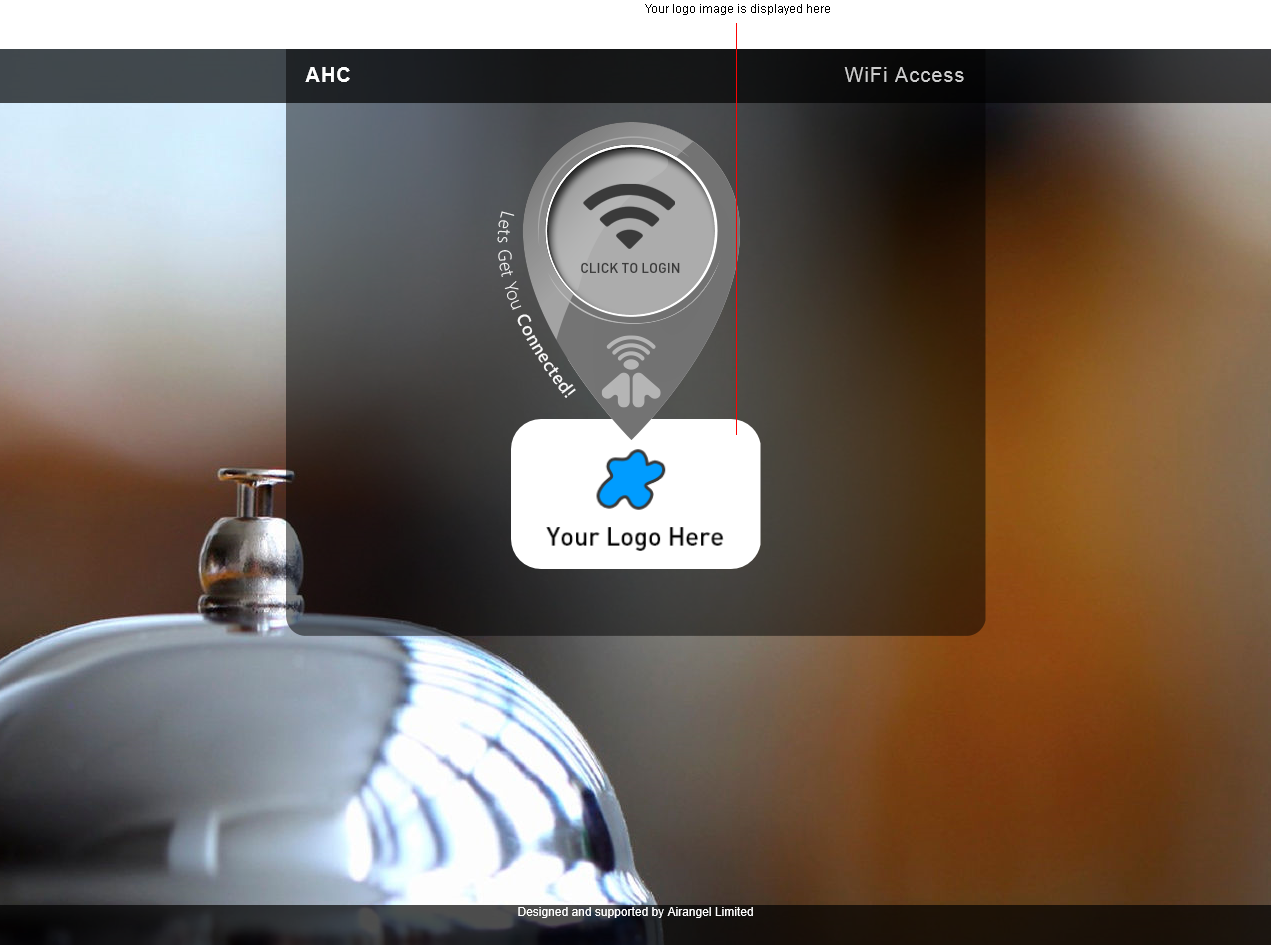
6. Logo.
Browse your files and add an image to your portal, such as your company
logo. Any image you add must be in PNG format and under 1 Mb. The image
must also have a white background and not exceed 200px width and 180px
height. Use the Reset Logo button
to remove the file listed. Click
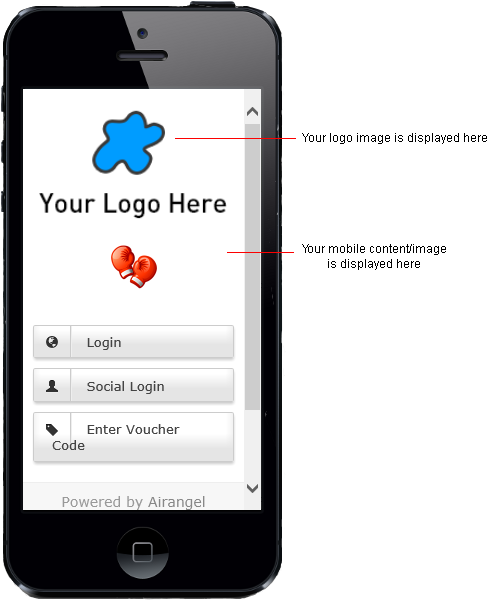
here to see how your logo is displayed in your portal.
7. Select whether to switch on the Mobile Portal. Select Mobile portal ON to force a mobile portal design to mobile devices.
8. Choose to add either:
Mobile
content. Use HTML to add content. This is useful for adding a simple
message.
-or-
Mobile
content image. Browse your files and add an image to the mobile
portal, such as your company logo. Any image you add must be in PNG format
and under 1 Mb. The image must also have a white background and not exceed
200px width and 180px height.
Click
here to see how your selections are displayed in your mobile portal.
9. Questions. Use this section to set up security questions. The guest user must complete these questions when registering to use your WiFi portal. If they have any support issues during WiFi portal use they will need to answer these questions to confirm their identity.
10. Click Create
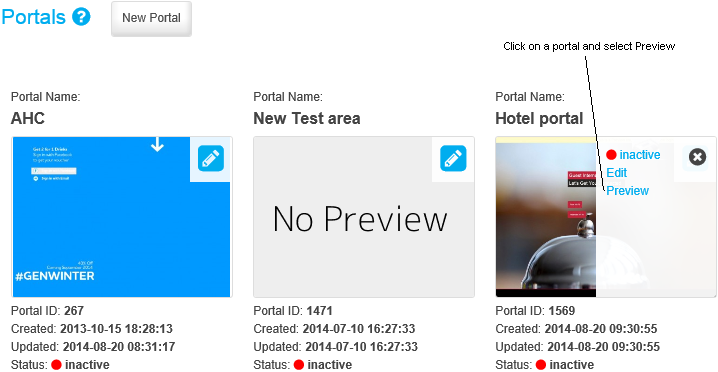
Portal. The new portal is displayed in the Portals screen.
You can preview your portal from this screen.